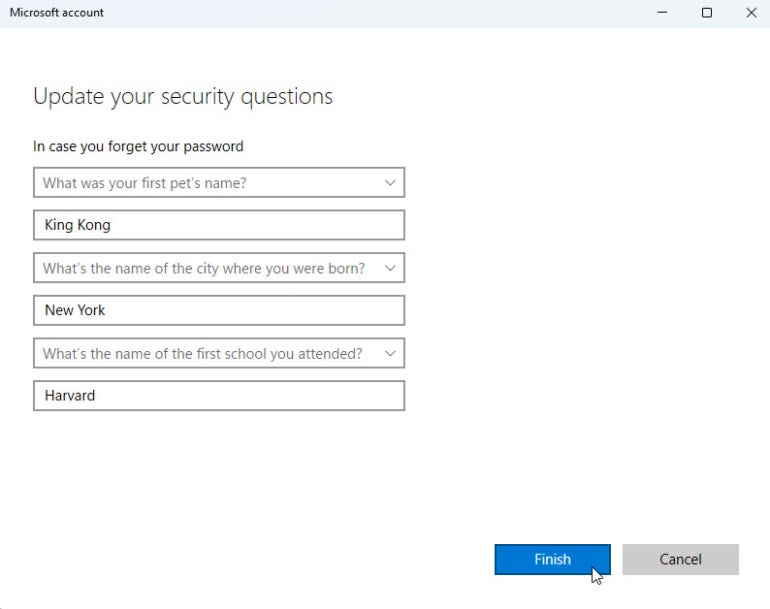
You’re using Windows 11 Pro on a personal PC and would prefer to sign in with a local account rather than a Microsoft account. Microsoft doesn’t make it easy for you to use a local account, even in Windows 11 Pro, but it is doable. Through a tricky workaround, you can choose a local account during the initial setup, or you can switch a Microsoft account to a local one after the OS has been set up. A local account also requires you to establish three security questions in the event you ever forget your password. Here’s how it works.
SEE: Explore these Excel tips every user should master.
How to set up a local account in Windows 11 Pro
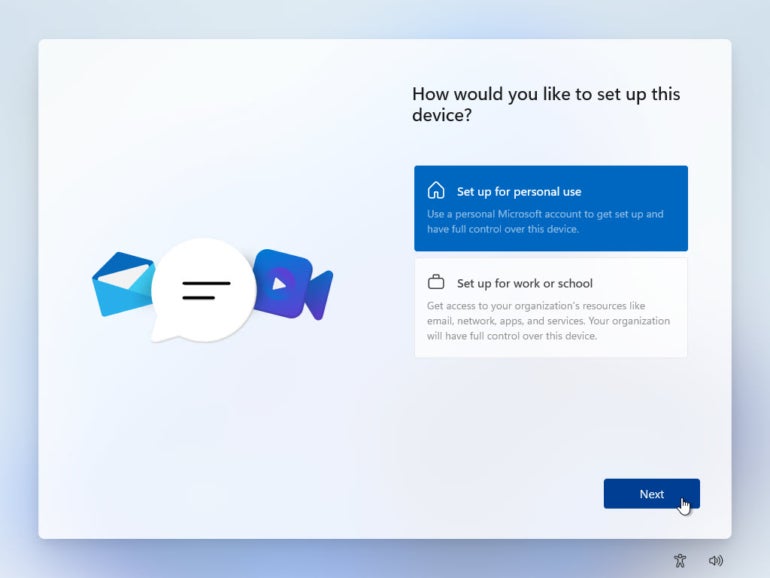
Let’s say you’re setting up a Windows 11 Pro computer for the first time, or you’re resetting Windows. At some point during the setup process, Windows will ask whether you want to set up the PC for personal use or for a work or school account. Choose the option for personal use. Click Next (Figure A).
Figure A
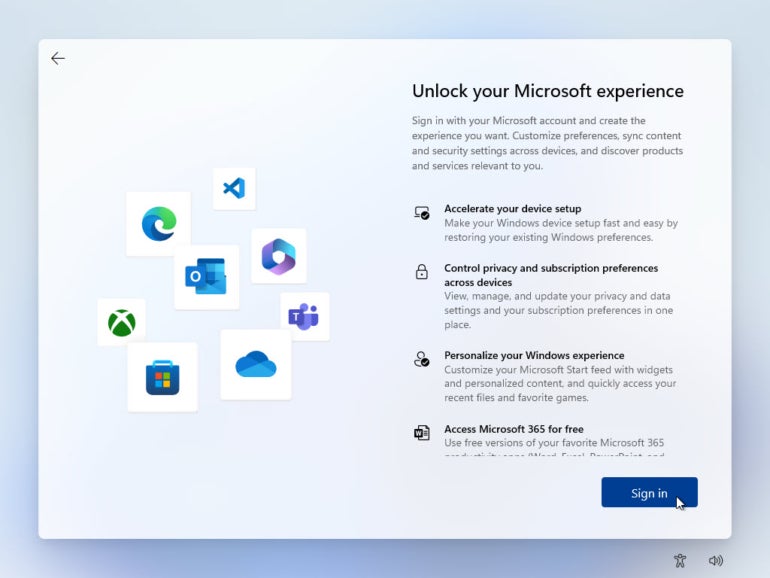
At the next screen, Microsoft touts all the benefits of using a Microsoft account. Click the Sign in button. Don’t worry, you’ll still be able to opt for a local account (Figure B).
Figure B
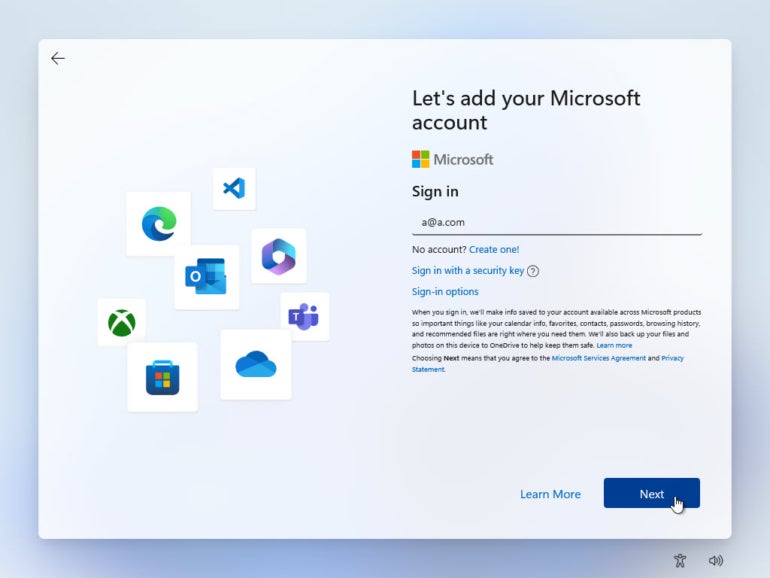
The next screen asks you to enter the email address for your Microsoft account. But instead of adding a legitimate address, you’re going to add a specific address for a locked dummy account designed to bypass this requirement. At the prompt, type the address: a@a.com. Click Next (Figure C).
Figure C
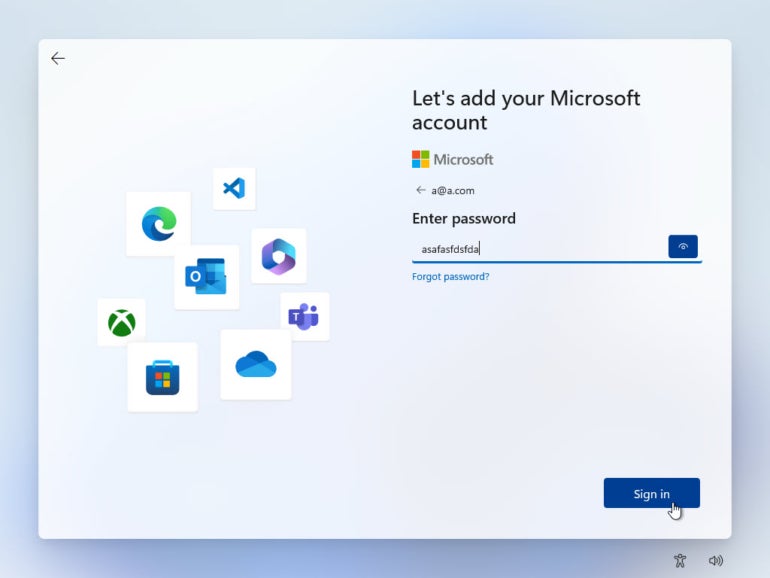
The next screen prompts you to enter a password for the account. At this point, just type any random string of characters. Don’t worry; you won’t need to remember or use this password again. Click the Sign in button (Figure D).
Figure D
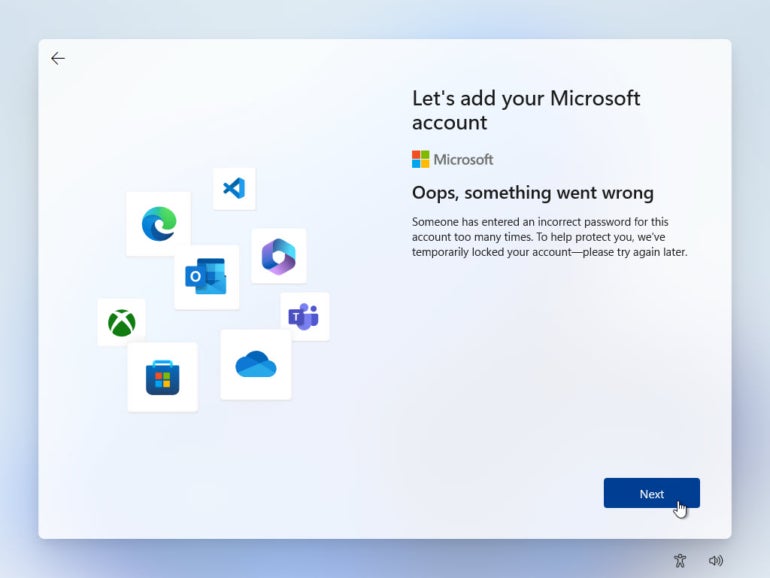
After entering the bogus password, Windows displays an error message. No problem. That’s what should happen (Figure E). Click Next.
Figure E
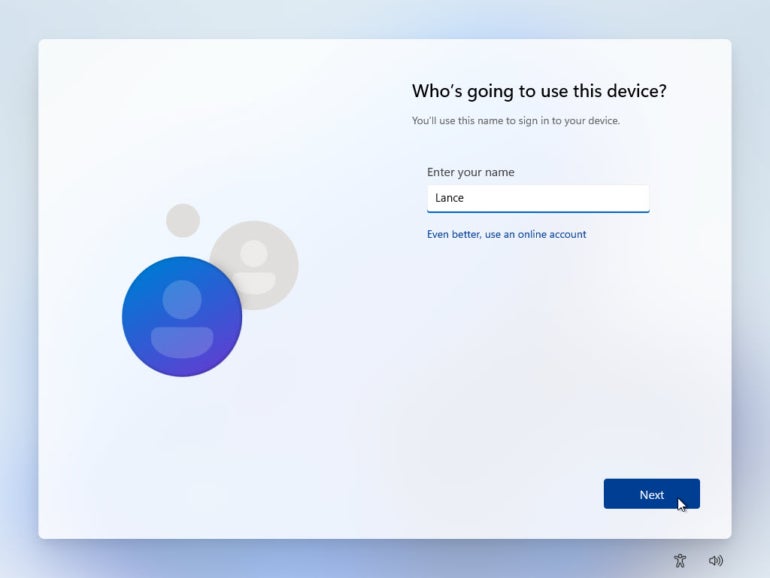
Rather than fight you any further, Windows 11 finally lets you set up a local account. At the screen asking who’s going to use this device, type the name you wish to use for your local account (Figure F).
Figure F
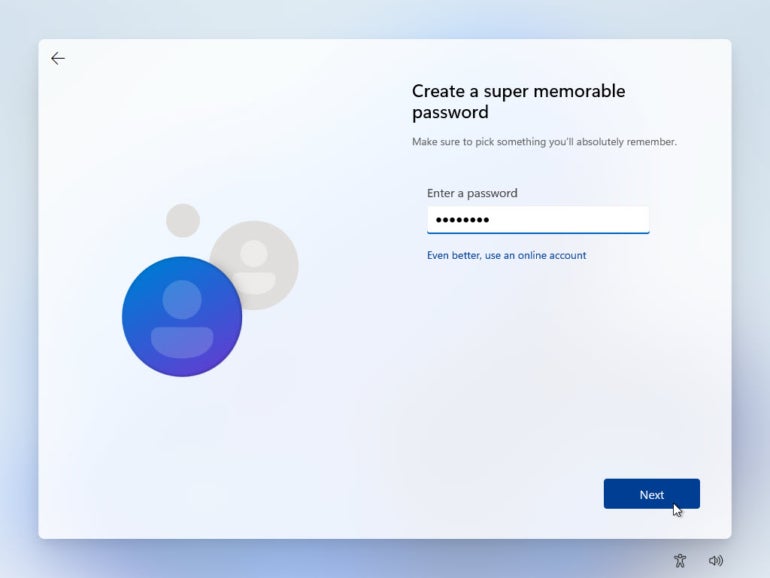
Next, type the password you wish to apply to your account (Figure G). Click Next.
Figure G
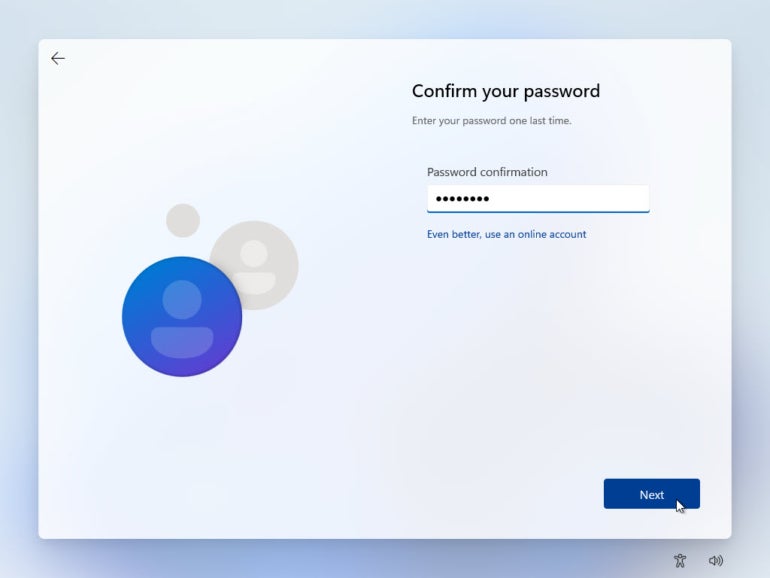
Confirm the password you created at the next screen (Figure H).
Figure H
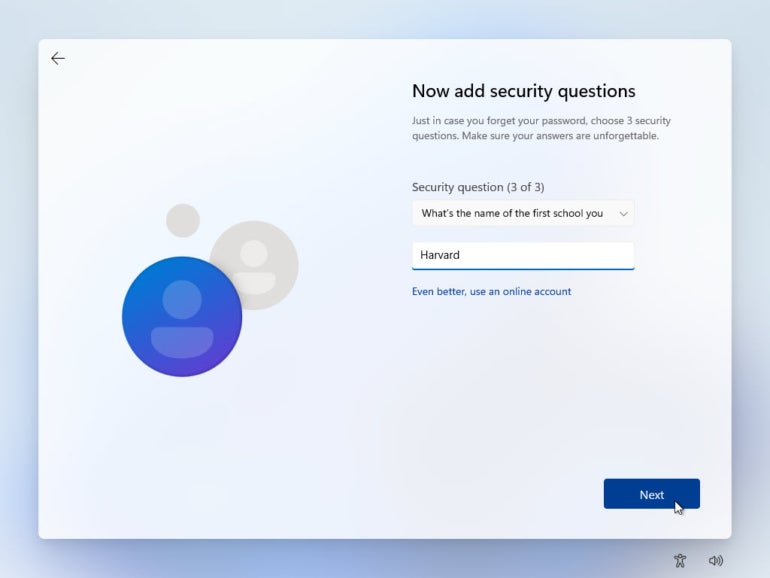
The next screen asks you to choose three security questions to help you recover your local account should you ever forget the password. Select the first question and then type your answer. Do the same for the second and third questions (Figure I).
Figure I
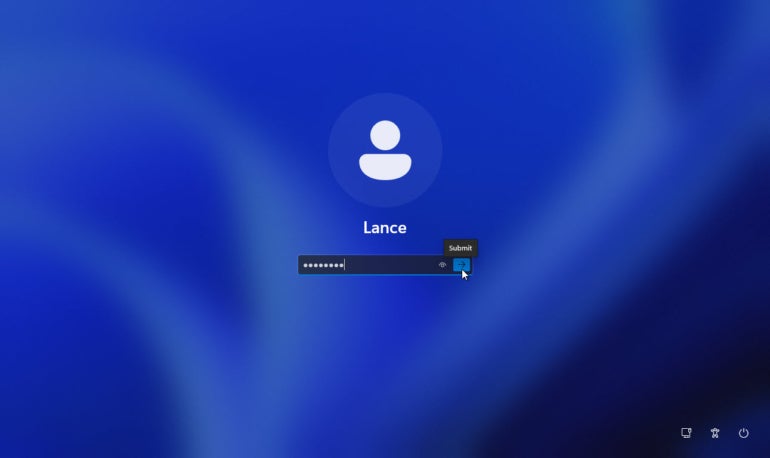
Complete the Windows 11 setup. After the setup finishes, Windows automatically logs into Windows 11 with your local account credentials. The next time you sign in, enter the password for your account (Figure J).
Figure J
After setup
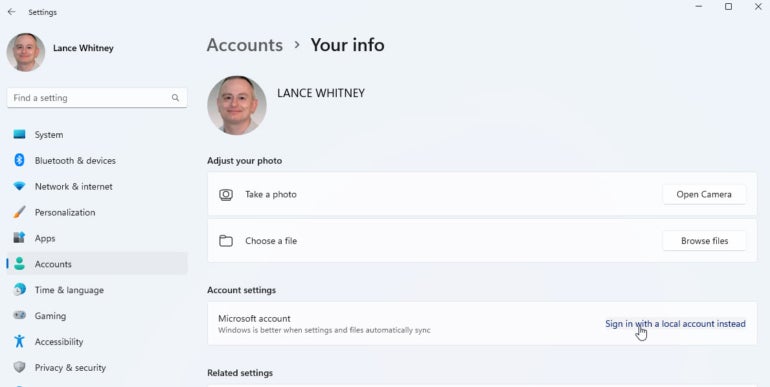
If you’re already in Windows 11 using a Microsoft account, you can switch to a local account at any point. Go to Settings and then Accounts. Select the setting for Your Info. Under Account Settings, click the link for Sign in with a local account instead (Figure K).
Figure K
SEE: Learn how to personalize your Windows 11 account.
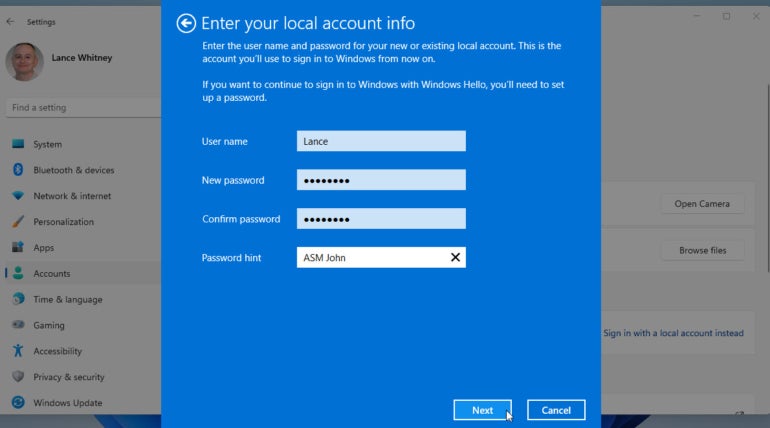
In an effort to deter you, Microsoft displays a screen with a large message asking if you’re sure you want to switch to a local account. Click Next. Type the password or PIN for your Microsoft account. At the next screen, confirm or change the name you want to use for your local account. Type and then retype a password and create a password hint if you wish. Click Next (Figure L).
Figure L
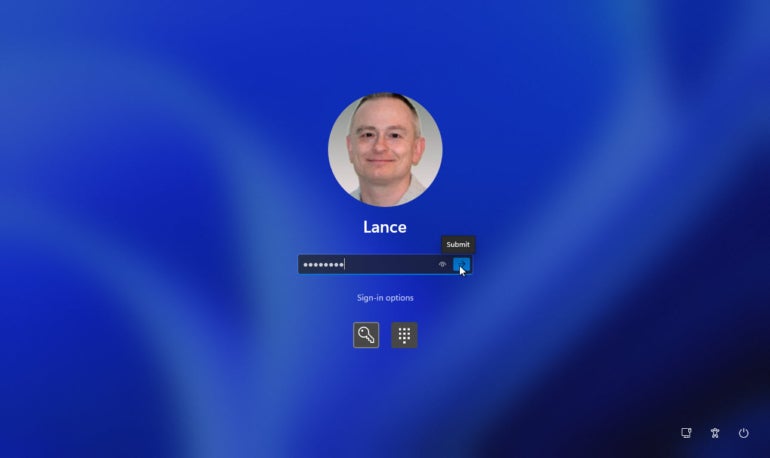
Next, click the Sign Out and Finish button to log out of Windows with your Microsoft account. Windows then displays the login screen for you to sign back in with your local account (Figure M).
Figure M
There’s one hiccup switching from a Microsoft account to a local account: Windows won’t prompt you to create security questions and answers. And if you check the password entry under Sign-in options for your account, there’s no setting to create them as there is in Windows 10. For this, you’ll have to use another workaround.
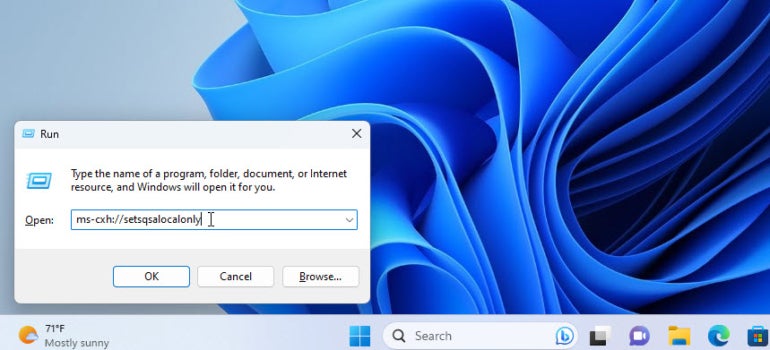
Press Win+R to display the Run dialog box. In the Open field, type the following string: ms-cxh://setsqsalocalonly (Figure N). Click OK.
Figure N
Create your three security questions and answers (Figure O). Click Finish, and you’re all set.
Figure O
